Home Canning Green Beans
Garden fresh green beans are a staple for any pantry. They are easy to grow, and pretty simple to preserve using a pressure canner. When the snow is flying in the winter, there is nothing better than the taste of veggies fresh from the garden.
When
you can green, string, Italian, or wax beans, select beans that are tender and
small. Remove the ends and strings from the beans. Can them whole or cut them
into 1- to 2-inch pieces. Canning and preserving low-acid foods — such as green beans
— requires pressure canning to kill microorganisms that are harmful if not
destroyed before ingesting the food. Pressure canning at 240 degrees kills the
botulism bacteria. If this temperature is not achieved and the bacteria is not
killed, one taste of this spoiled food can kill you. Simply boiling food on
the stove top will not kill any botulism and should not be considered a safety
step.
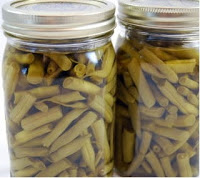
Canned Fresh Green
Beans
This is a great first recipe for the beginning pressure
canner. Although this recipe specifically uses green beans, all colors of beans
— green, yellow or purple — work equally well.
Preparation time:
15 minutes
Processing time:
Pints, 20 minutes; quarts, 25 minutes
Pressure level:
10 pounds
Yield: 16 pints or 8 quarts per approx. 4 lbs of beans
Prepare your canning jars and two-piece caps (lids and screw
bands) according to the manufacturer’s instructions.
Clean and cut the beans. Remove any dirt and shake off the
excess water. Trim off the ends of the beans and cut them into 2-inch pieces.

Tightly pack the cut beans into the prepared jars. Pour water
over the beans, leaving 1-inch headspace. Add 1/2 teaspoon salt to each pint
jar or 1 teaspoon salt to each quart jar (optional).
Release any air bubbles with a nonreactive utensil, adding
more water as necessary to maintain the proper headspace. Wipe the jar rims;
seal the jars with the two-piece caps, hand-tightening the bands.
Process the filled jars in a pressure canner at 10 pounds
pressure for 20 minutes (pints) or 25 minutes (quarts).

Allow the pressure to return to 0, wait an additional 10
minutes, and then carefully open the canner lid.
Remove the jars from the canner with a jar lifter. Place
them on a clean kitchen towel away from drafts.
After the jars cool completely, test the seals. If you find
jars that haven’t sealed, refrigerate them and use them within two weeks.
Prior to eating or tasting, boil the food for 15 minutes.